Matomo
Matomo is an open source web analytics solution which gives you full ownership of your data. It’s a GDPR compliant alternative to Google Analytics. You can learn more about Matomo on their website. Matomo on Clever Cloud allows your marketing team to setup a tailored web analytics solution, that adapts to your needs and workloads.
How it works?
When you subscribe the Matomo add-on, we automatically setup a PHP instance based on the latest Matomo release. It comes with the required MySQL database and an optional Redis cache.
We have chosen to let you see and manage these companion add-ons in the Console so that you could adjust them to your needs. You can change their settings and use the Clever Cloud ability to migrate from an S flavored database or cache to an L or XL if required. You can also activate auto-scalability (horizontal and/or vertical scaling).
By default, Matomo on Clever Cloud comes with small sized resources:
- PHP Nano
- MySQL XXS BigStorage
- Redis S
We’ve already integrated the Clever Cloud SSO, so you can login directly into your Matomo instance from the Console, start to integrate your website, create different users.
Create Matomo add-on
From the Console
- Create a new add-on by clicking on the Create… dropdown in the sidebar and then an add-on.
- Select the Matomo add-on.
- You can skip linking the add-on to an application, it won’t be needed.
- Enter the name of your Matomo add-on and select the zone where you wish to deploy it.
- It’s done!
Using the CLI
Make sure you have clever-tools installed locally. Please refer to the setup guide if needed. In your terminal, clever addon create addon-matomo <name> --region <region> --org <org> (--org and --region are optional). You’ll get URLs to manage your Matomo instance:
$ clever addon create addon-matomo myMatomo
Add-on created successfully!
ID: addon_xxxxxxxx-xxxx-xxxx-xxxx-xxxxxxxxxxxx

Real ID: matomo_xxxxxxxx-xxxx-xxxx-xxxx-xxxxxxxxxxxx
Name: myMatomo

Your Matomo is starting:
 - Access it: https://xxxxxxxxxxxxxxxxxxxx-matomo.services.clever-cloud.com
 - Manage it: https://console.clever-cloud.com/addon_xxxxxxxx-xxxx-xxxx-xxxx-xxxxxxxxxxxx

/!\ The addon-matomo provider is in beta testing phase
Refer to the Clever Tools documentation for more details on add-on management.
Accessing the Matomo interface
Once you created your add-on, open the management URL or use the Access Matomo link in the Matomo dashboard from the Console. To authenticate, you’ll only need to use your Clever Cloud account.
Clever Cloud has its own SSO (Single Sign-On) authentication to authenticate to various services. All members of your organisation will be able to authenticate to the services in the same organisation, using their Clever Cloud account. When a service needs to authenticate you, it redirects to a login form. Enter your Clever Cloud credentials as well as your 2FA Authentication code if needed.
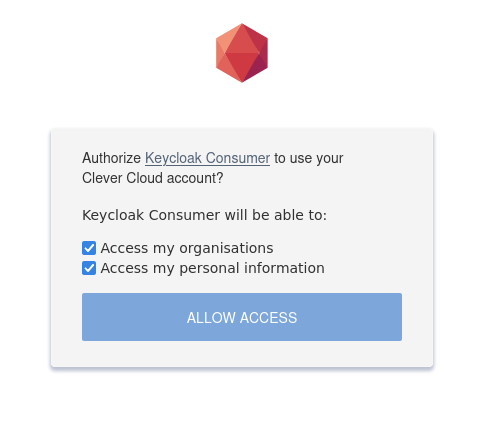
If it's the first time you use the Clever Cloud SSO, accept all the tokens permissions listed, otherwise the backend service might not work correctly. If you mistakenly disabled some rights at some point, you have to revoke all tokens generated by this OAuth consumer:
- First, go to your user's OAuth token in the Web console
- Then, find all tokens named
Keycloak Consumerand revoke them - Try to log-in again. The rights list should now be displayed.
Configure your Matomo instance
Once you accessed your Matomo interface, we can start configuring it. A custom Clever Cloud configuration is automatically installed on your instance during the provisioning.
This configuration helps you to benefit from optimizations by using a Redis cache by default.
Using your Matomo
If you’re new with Matomo, you would probably want to read the Matomo’s guides on the official documentation.
Matomo plugins
Your Matomo instance comes with a list of pre-installed plugins. As a managed instance, our Matomo add-on won’t let you bypass the installation process. Installed plugins already allows a quite advanced use of Matomo, but if you wish to install a specific plugin that’s not in your instance, feel free to contact our support team.
When activating a deactivated plugin
Keep in mind that some plugins might consume more resources than you have by default on your PHP instance, since some PHP processes can take a long time, depending on what you are doing.
If you activate a deactivated by default plugin (like GoogleAnalyticsImporter):
- Scale your PHP app
- Disable auto-scalability for the PHP app
- Scale your Matomo MySQL add-on
If you activate the plugin while enabling auto-scalability, your PHP instance will restart with default settings when scaling, therefore disabling the plugin and killing the process.
Plugins can be browsed from Matomo own plugin repository.
QueudTracking
By default, the QueudTracking plugin is enabled on Matomo instances, with a queue size of 25. This means that the plugin stores 25 visits in a queue before they appear in Matomo. This helps to prevent the server from receiving too many request at once. You can change this setting by modifying the Number of requests that are processed in one batch parameter in Administration->System->General settings.
Delete old archive
By default, Matomo isn’t configured to delete the data that it receive. This can cause the databases to accumulate a lot of old data that may not be useful anymore and completely fill the databases. To resolve this issue, you can setup and automatic deletion of old achives in Matomo settings.
To do this, you must go to the Anonymize data menu in Administration->Privacy->Anoymize data. You have two option you can activate to delete old achives, Regularly delete old raw data and Delete old aggregated report data. When you activate one of those options, you can select how old the date needs to be for it to get deleted. When one of the two options is activated, you can schedule the frequency (every day, month, year) at which you wish to delete the data in Schedule old data deletion.
Security and updates
The Matomo add-on is a fully managed application, you don’t have to select a particular version. Clever Cloud updates it for both features and security, and manages it continuously to apply regular version upgrades. After being updated, you Matomo add-on could need to be restarted.
Plans
Matomo on Clever Cloud is the easiest way to set it up, but you can go further and adjust the flavor of your instance, database or cache independently. We provide different plans for PHP, MySQL and Redis.
Did this documentation help you ?