


Devastating news for WordPress haters: with a clean, secure, and modern file structure, you can easily migrate it to Clever Cloud. All of this is possible using the tools described in this post.
For those who have never used Git before, we will also cover how to deploy a WordPress installation on Clever Cloud in this post. If you want to give it a try, we’ll walk you through the steps. If you choose not to, our platform does offer a GitHub integration.
Requirements:
- A Clever Cloud account
- Le Bedrock’s Composer to deploy WordPress with Clever Cloud, that we have updated.
- A GitHub account if you deploy the code from it, or Git installed on your computer, if you choose this method.
Deployment and WorpdPress configuration
Composer will deploy a WordPress site in a matter of minutes, creating a rapid, light, and secure framework for our new website.
Follow the instructions below:
1. Get the code
The code can be found in its “WordPress + Bedrock” . public repository. It has a WordPress architecture that works with Composer. There are two ways to download it: directly from Git or GitHub (the easier choice if you don’t feel comfortable using command lines).
Take this post as an opportunity to learn more about command lines on a Terminal and Git, even if you aren’t accustomed to them. No worries, by following our directions, you will be able to use this method..
Option A : Using GitHub
If you really don’t want to use Git, simply fork the code and deploy from GitHub on Clever Cloud. Creating a fork will duplicate the code in your own repository.
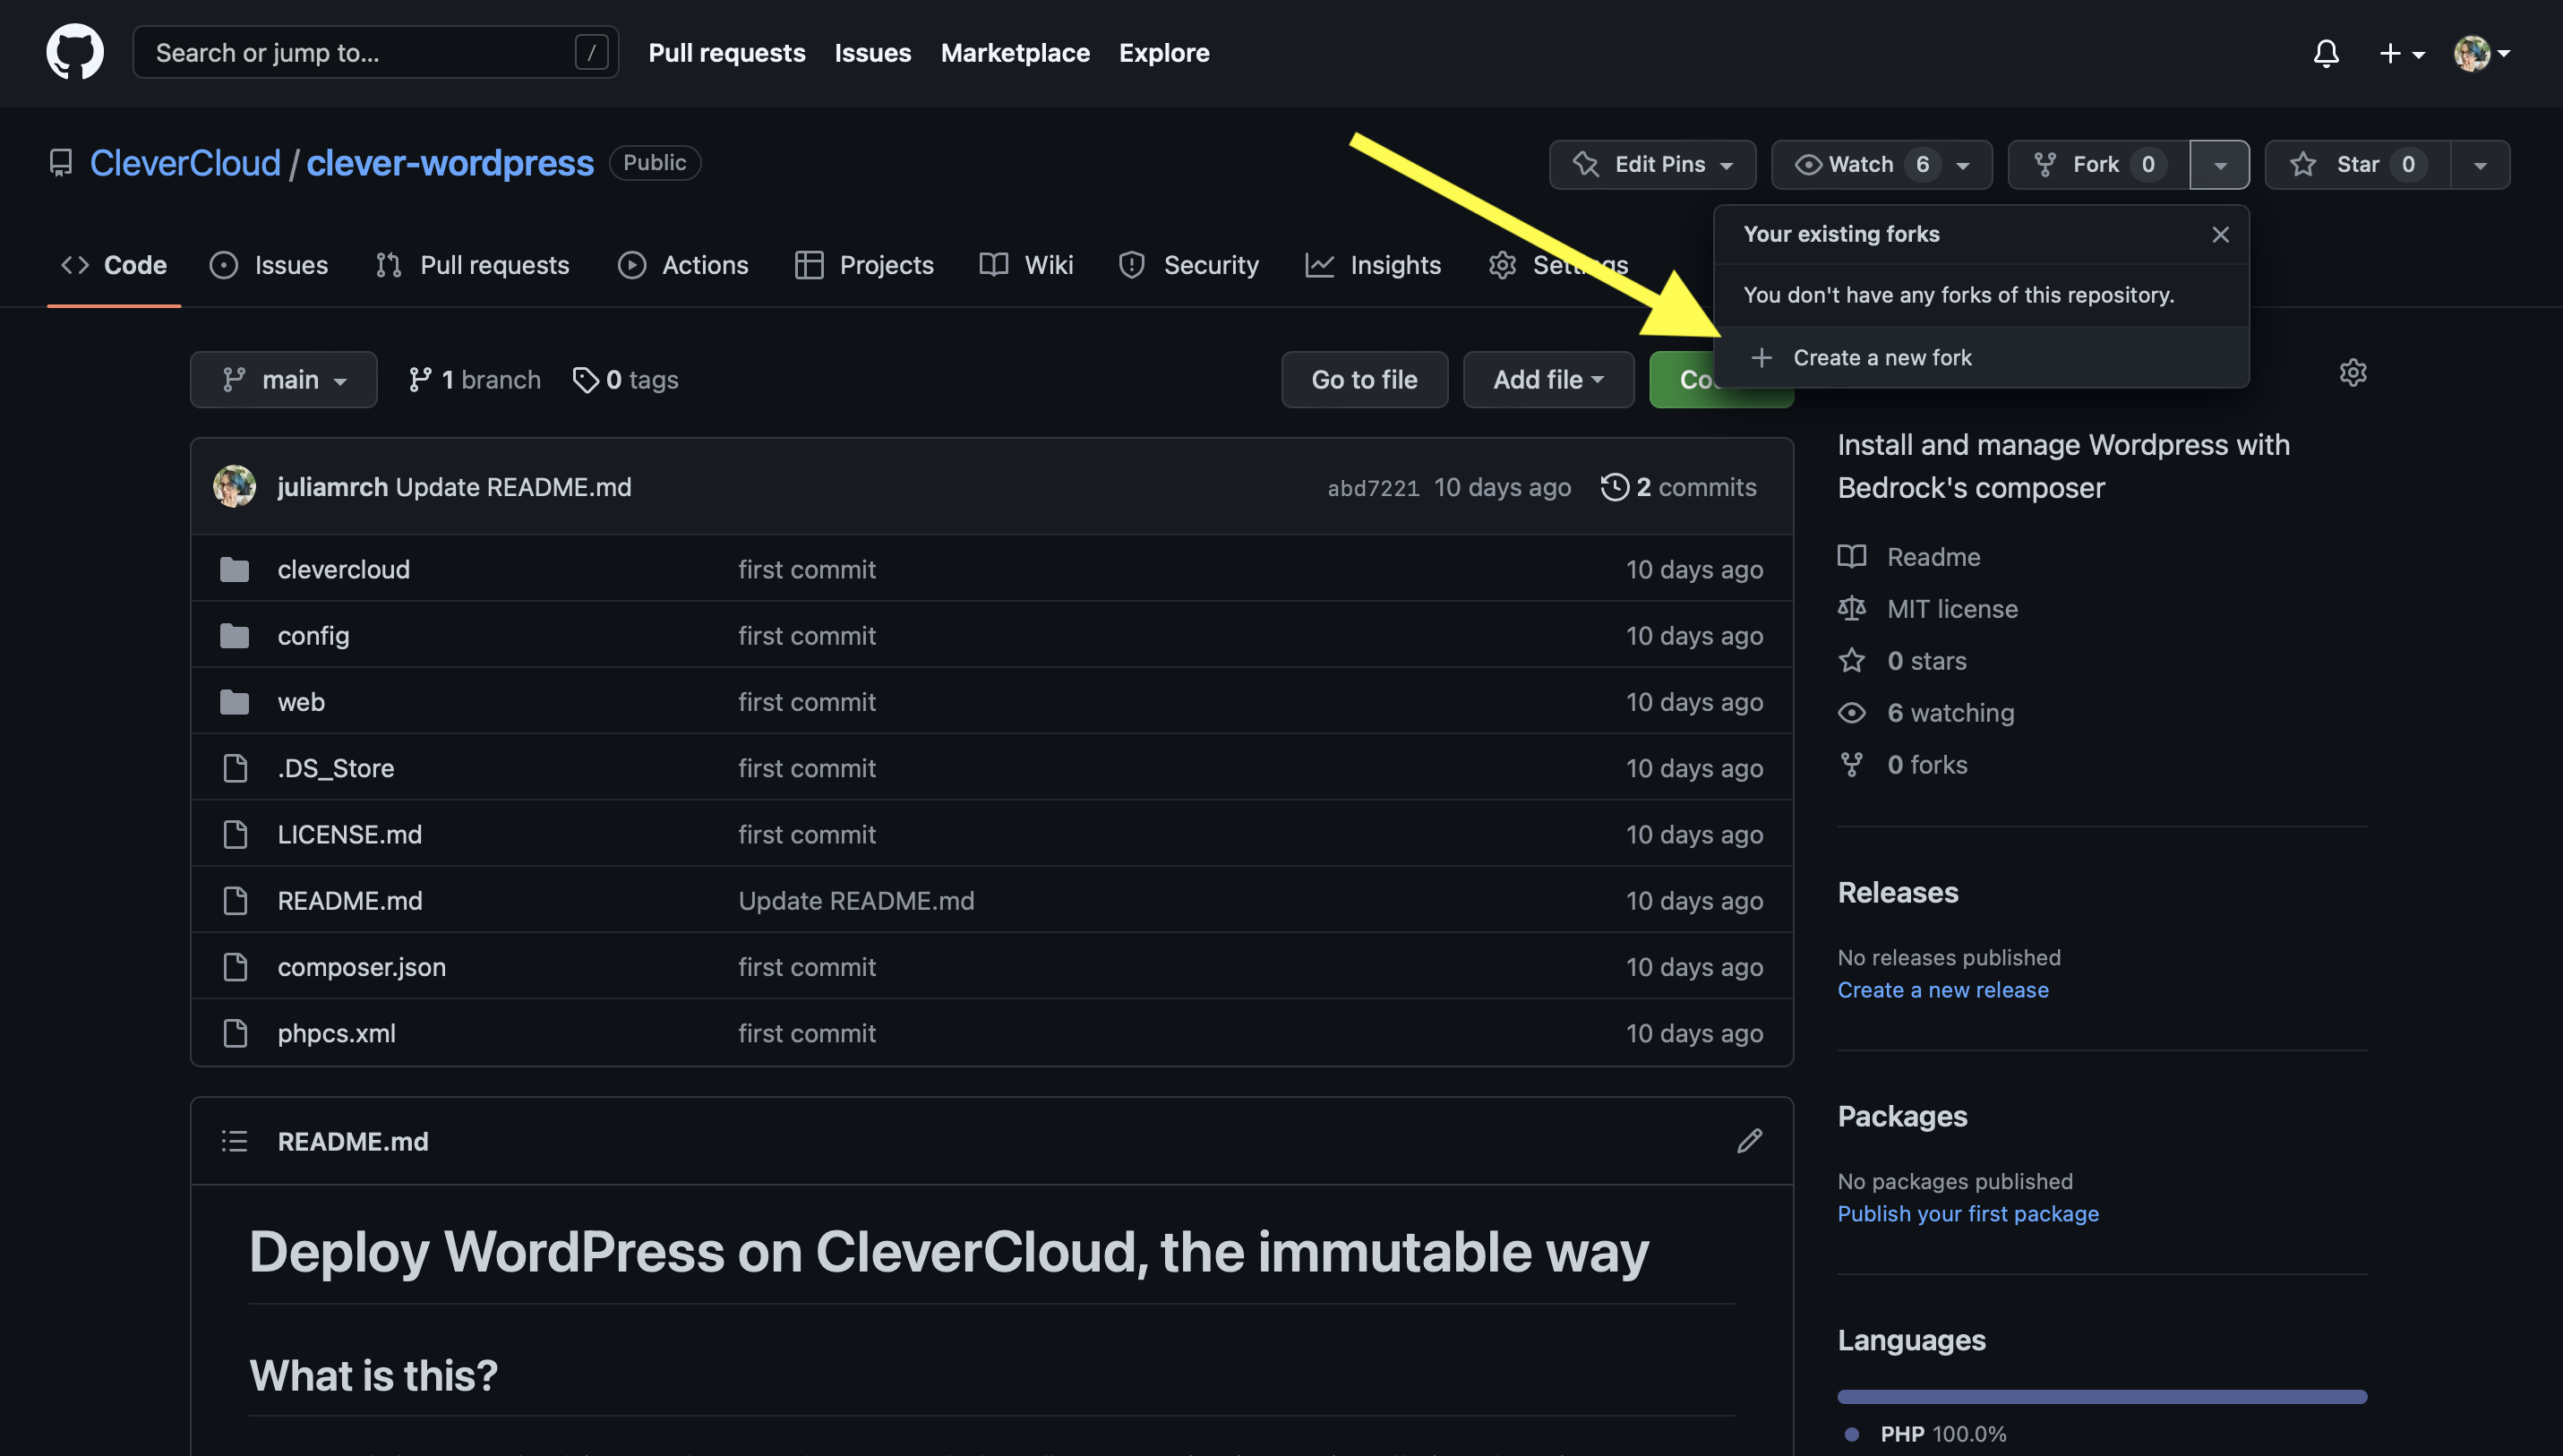
Open the Clever Cloud Console settings, clic on “Profile” and link your GitHub account, if you haven’t done it already. That’s all, now go directly to step 2.
Option B: Using Git, step by step
The other option is to download the code to your computer (locally). If that’s your first time, here are the instructions:
Set up
You must first grant permission for your computer to push code to Clever Cloud before you can proceed. You must create and add an SSH key to your console if you haven’t already. Go directly to the next step if it has already been completed.
Open your Terminal and:
- type
ssh-keygen -t ed25519 -C "[votre@email.ici]the email must be the same you use to log into Clever Cloud. - When the Terminal asks you in which file you wish to add the key, juste press “Enter”.
- Add a password
- Copy the key content using
pbcopy < ~/.ssh/id_[rsa].pub(replace[rsa]by your key id, of course)) - Open the Clever Cloud Console and go to Profile>SSH keys>Add and paste your key’s content.
Your machine is now connected to your Clever Cloud account and ready to push code.
Clone the code
- Make a
sitesdirectory on your computer. It will contait your apps and your websites. - Open your terminal and type
cd sites, this will open your “sites” directory. - Still in your terminal, copy-paste
git clone git@github.com:CleverCloud/clever-wordpress.git'
The code has been downloaded to your computer, inside the sitesdirectory, you’ll see a a new clever-wordpress directory. Open it (cd clever-wordpress) et type ls -a : you’ll see all the files and directories it contains.
If you just used Git and your Terminal for the first time, you’ll find more tutorials and explanations on the Internet. Our teammate David Legrand happens to publish great stuff I greta stuff in French.
2. Declare the app on Clever Cloud
Click “Create” and “An application” from the Clever Cloud Console. After choosing your fork, you can create a new PHP app if you are using GitHub integration. All that remains is for the code to be pushed from GitHub. If you’re using Git, the identical procedure can be carried out by entering a short command line.
The Console will ask if you need any add-on, choose a MySQL database and proceed.
Edit your PHP app environment variables in expert mode and past the salts generated on sur this page (don’t forget to save changes!)
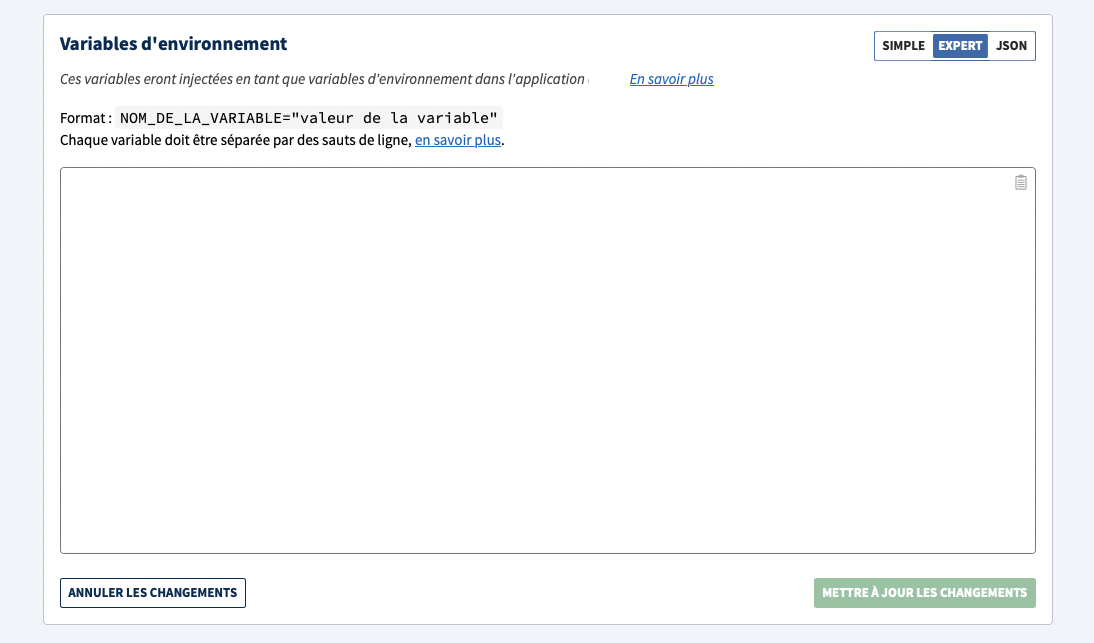
- Add 3 additional environment variables:
WP_ENVwith valueproductionWP_HOMEwith valuehttps://yourdomain.tldWP_SITEURLwith valuehttps://your-domain.tld/wp

The Console will provide you with command lines to copy-paste in your Terminal in order to send your code to your new instance, unless you’ve decided to work with the GitHub integration. The deployment will begin once you’ve completed this.
While the deployment starts, create an Cellar addon and link it to your app (clic on your PHP app, then choose “Linked dependencies” to connect it).
From the Cellar set up page, create a bucket and give it a name.
Go back to your PHP app and add the following environment variable:
CELLAR_ADDON_BUCKET with the name of your bucket as value.
Tip : You can easily configure a custom domain for your bucket. Check the doc.
Restart your app to incorporate last changes. Don’t forget to set up your domain for the WP_HOME variable (or with a .cleveapps.io for testing purposes).
When you’ll visit your website, the installation page from WordPress will then appear (you’ll find de database credentials in the Console, either by clicking on the addon, either in your app’s environment variables). Once you are logged into WordPress, go to your plugins page and activate S3 Uploads.
That’s it. You now have a hosted WordPress on Clever Cloud. Your files and medias will be stored in the Cellar’s bucket.
Add a plugin by a single command
The composer.json file reflects the WordPress themes and plugins directory; you just have to specify what it should reflect. You don’t need to host the plugin directory in your app to add a new plugin to your site. You’ll use Wpackagist to find and add the plugin’s references to composer.json.
Find require , this is where the plugins are specified.
"require":
//Here are your further plugins declarations. Add this line wherever you'd like (update the version if necessary)
"wpackagist-plugin/[plugin]": "[version]",
You’ll find all your favorite plugins on Wpackagist to add them to the file. Commit changes (with Git : git add . et git commit -m "un-message") and push the modified code to Clever Cloud (on GitHub, this action will be done automatically). Wait until your app has redeployed, then go top your WordPress dashboard and activate the plugins you just added.
Welcome aboard!!